Here are the key points to understand:
- A measurement may cover many rooms, walls or other features.
- Each measurement may have a unique color.
- Create the fewest you can get by with to keep things fast and simple.
- Varied and unrelated items may come from the same measurement.
For example: carpet removal and wallpaper application.
Pressing the New button near the bottom right, will create a new, empty
"Measurement Group" so you are ready to start measuring. After you draw
measurements into it, you will create one or more items and then press
the "New" button again to start your next group of measurements.
You start drawing measurements by pressing the "Measure" button on the top left.
This will open the
"Measure Tool" dialog to start the process.
The box in the bottom right corner of the "Item Creator" dialog displays and lets
you navigate the Measurement Groups on the current drawing sheet. They are numbered
for reference and navigation. You may press the "Prior" and "Next" buttons to set
the currently viewed and edited measurement group.

Also, on the "Item Summary" dialog, all the Measurement Groups are represented on
the list (with or without Quantity Items) by alternating gray bands in the
background color of the list.
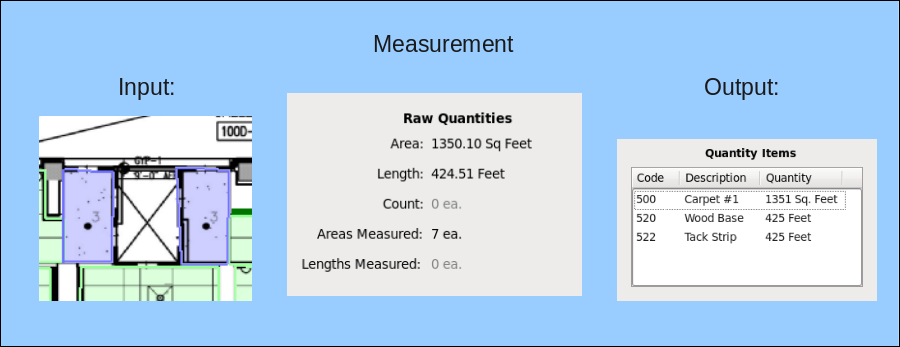
The summed results, of the drawn measurements in this group, appear up on the left
side under "Raw Quantities".
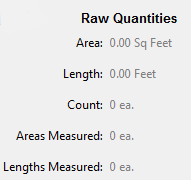
- "Area" is the total square units of area, from any Rectangle or Area measurements drawn.
- "Length" is the total perimeter of the areas, plus the sum of the Length measurements that were drawn.
- "Count" is the total number of count symbols placed.
- "Areas Measured" is the number of individual Rectangle or Area measurements drawn,
such as the number of rooms with a particular floor covering.
- "Lengths Measured" is the number of Length sequences drawn.
So the idea of when to create a new Measurement Group is fairly simple: whenever you
are about to draw a measurement which should not be summed with the last ones you just
drew, create a new Measurement Group.
Any of these "Raw Quantities" may be copied to the clipboard (shared paste buffer),
so they can be pasted into another program. Just press the copy directly to the left of
the needed quantity.

Usually a "Raw Quantity" is used to create a specified "Quantity Item" (the list on the right).
This is done by pressing the "Create Item" button which is directly to the right of each
Raw Quantity. This will open the
"Create Item" dialog to walk you
through the process.
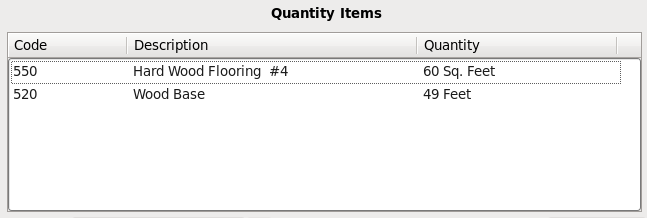
Each Measurement Group may have one or more Quantity Items created from the Raw Quantities.
This is free-form. You may even use the same Raw Quantity twice to represent different items.
Many trades have only one Item per Measurement Group but it's common to draw area measurements
with the primary item based on the total Area but also to have a secondary item derived from
the perimeter (in summed Length, Raw Quantity).
The "Edit Item" button returns you to the "Create Item" dialog as an edit dialog, where
you may change any settings or delete the item. A double-click on the item will also open
it for edit.
The color attribute applies to all the drawn measurements in the Current Measurement.

To change the color, press the button and select it. Note color selection is not limited
to the sample set displayed. The color selector dialog allows you to specify any shade.
In order to keep your companies color standard consistant, you usually only pick the color
once and then save it to the Quick-Library along with the items, where it will be
automatically applied (eliminating variations in hand selecting).
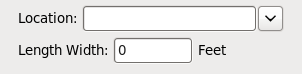
Two other attributes which may be set for a Measurement Group are Location and
"Length Width". Location is an optional description to tag the measurement's
whereabouts or any other info. The pulldown button to the right will contain
a list of the text contained in other measurements in the same volume so you
do not need to re-type them.
The "Length Width" field is a special feature which allows you to use the length
measure tool to get a length measurement and, if a non-zero "Length Width" is set,
you will also get an Area quantity produced by simply multiplying the length by
the "Length Width". An example of use is to trace down the center of a 3 foot wide
sidewalk and with the "Length Width" set to 3 feet, the Raw Quantities will reflect
the length and area of the sidewalk.
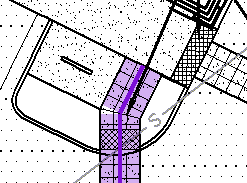
When "Length Width" is used, the displayed mark-up on the drawing will show the
original line with shading out both sides. Unlike the line thickness of the line
drawing tool, the "Length Width" is displayed with an accurate scaled size (assuming
that the drawing scale is accurately set).
The "Delete Measurement" button will delete all the drawn measurements in the current
Measurement Group as well as the set color and any items (after a confirmation).
This will affect the current Measurement Group and the rest will remain.
 Overview of Process:
We have just covered the mechanics of the "Item Creator" dialog and if you haven't
read it yet, this is a great time to read
QuickEye Measuring and Estimating Overview.
It covers how "Item Creator" functions, as the hub of the take-off process and describes
the flexibility of the system and it's accelerators, as well as how they work together.