- Duplicate Measurement Groups/Quantity Items from other sheets
- Draw measurements to Measurement Groups/Quantity Items
Quick Tips:
- After Measurements with Items are created with Item Creator or Quick-Library,
Quick-Creater is a floating dialog to add to them.
- Quick-Creator stays open while you work.
- It can be placed on a second monitor.
- Quick-Creator displays all unique items in the Document Volume from all sheets.
- Select Item, review current tool at bottom, change or set as needed, then start
drawing measurements.
- If the selected item does not exist yet on this sheet, it is automatically created.
- The tool is automatically set to the last tool used on this item.
- Because it's a floating dialog, you may switch sheets at any time.
- Once on a new sheet, you may set the Location field once to tag all the Measurement
Groups about to be created on that sheet.
Detailed Instructions:
The Quick-Creator dialog is opened from the "Item Creator" dialog by pressing the
"Quick-Creator" button.
First, Item-Creator or Quick-Library is used to create Measurements, set the color
on each Measurement, and then add one or more Quantity Items to each one. This
process can be done as you draw the measurements, but with Quick-Creator, you can
create them all first, and then rapidly select an item and draw initial or
additional measurements on each one.
The first time you open the Quick-Creator dialog, it appears over the left side of
your main window to be out of the way and to indicate that it is a floating dialog
window. Floating dialogs may stay up while you work and may be moved so they are
not in your way. If you have a secondary monitor, the Quick-Creator dialog may be
placed there and it will re-open in that position the next time you open it. You
move it by left-dragging the title bar at the top of the dialog.
If you don't have a second monitor, you may reduce the size of the main
QuickEye
window so that it's not under the Quick-Creator dialog. This is optional but it
will allow you to zoom in and pan around while you work, without Quick-Creator
covering any of the drawing.
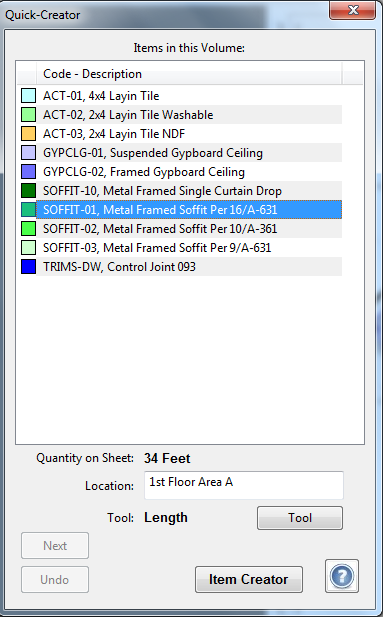
Quick-Creator displays all unique items (Measurement Group/Quantity Item combinations),
from all the sheets in the current Document Volume. The displayed list is filled as follows:
- It will include Measurement Groups which have the same Scale Units as the current sheet
- It will include Measurement Groups which have one or more Quantity Items
- When a Measurement Group has multiple Quantity Items, all items will be shown
- Identical items will be shown once
- If Measurement Group color or exact combination of Quantity Items is not the same,
it is not identical (and will be shown twice)
If the list is empty when you are expecting items, it's probably because the Scale Units
of the item on the other sheet do not match the Scale Units of this sheet.
To use Quick-Creator, select one of the items on the list and then review the current
tool selection at the bottom. If the item contains no measurements on any sheets, the
tool will be unset, indicated by the word "None".
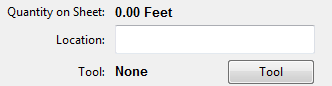
If it is unset or it is not set to the one you need to use, press the "Tool" button to
open the "Measure Tool" dialog to select a tool and enter measure mode. Then you may
proceed to draw the measurements for this item.
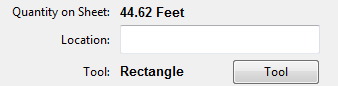
If the item you click on does have a measurement already drawn, the tool is automatically
set to the last tool used, and measure mode is turned on. You may immediately start
drawing or select a different tool.
If the selected item does not exist yet on this sheet, it is automatically created. A new
Measurement Group is added to the current sheet, the color on it is set, and the Quantity
Item or Items are created.
Because it's a floating dialog, you may switch sheets at any time by using the "Select Sheet"
dialog or the "Prior Sheet" and "Next Sheet" toolbar icons.

Once you are on a new sheet, you may set the Location field once, before clicking on any items,
in order to tag all the Measurement Groups about to be created, with that Location text.

 Dialog purpose: