File purpose:
- Provide starting point for semi-automatic, spreadsheet based pricing of QuickEye Quantity Items
Quick Tips:
Download Here: QuickEye Template.ots
( In LibreOffice Format, great free spreadsheet program )
- Set up stock items with default production rates, current pricing and labor rates, then install as template
- Use template to create new spreadsheet for each project
- Paste Item Summary from QuickEye, adjust production rates and markups
- Resolve any errors or unknown items, add extras and you have a bid price
- Flexible: Works with Capacity Based Markup or Estimated Total Volume based markup
Detailed Instructions:
Overview
QuickEye Estimator is a tool that's the heart of the estimating process.
The next step is costing, and many companies use a spreadsheet for that
purpose.
QuickEye Spreadsheet Template is a simple spreadsheet which
demonstrates a way to interface costing functions in a spreadsheet with
the output of
QuickEye.
It's designed to be useful, as is, for many trades but also serves as
a starting point to develop a very specific costing system for your
company or to simply serve as an example to give ideas on how to customize
your existing spreadsheet to accept
QuickEye output more efficiently.
It is provided free of charge from www.quickeye.us, and as such, comes
without warranty or support. But since it's a simple spreadsheet, you have
many options. You can clearly see each of the formulas, so if anything
does not behave as you expect you can investigate and modify to suit your
needs. Various online or local courses can be taken to understand the
basic or deeper functions of spreadsheets as well as self study.
There are also various consultants available to help very specifically
with construction costing.
 QuickEye
 Spreadsheet Template works with your spreadsheet program as a
template so when you use it to create a spreadsheet, it creates a new
spreadsheet which will insist on a new name (name of project), so that
you don't have to worry about over-writing the template with project
specific information.
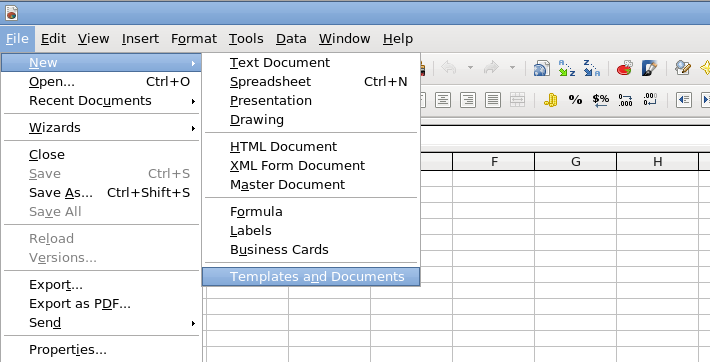
A template is actually just a normal spreadsheet file with a different
file name extension. With LibreOffice calc (free spreadsheet), the normal
spreadsheet extension is .ods, and the extension of the spreadsheet template
is .odt. With Microsoft Excel, the normal spreadsheet extension is .xlsx,
and the template extension is .xltx.
The template can be installed into the correct place so the program will
offer it when you create a new document but it's simpler to place it on
your desktop or a shared network drive (for access by multiple estimators).
This way you just double click it and it should open the spreadsheet program
with an untitled spreadsheet ready for your project specific information.
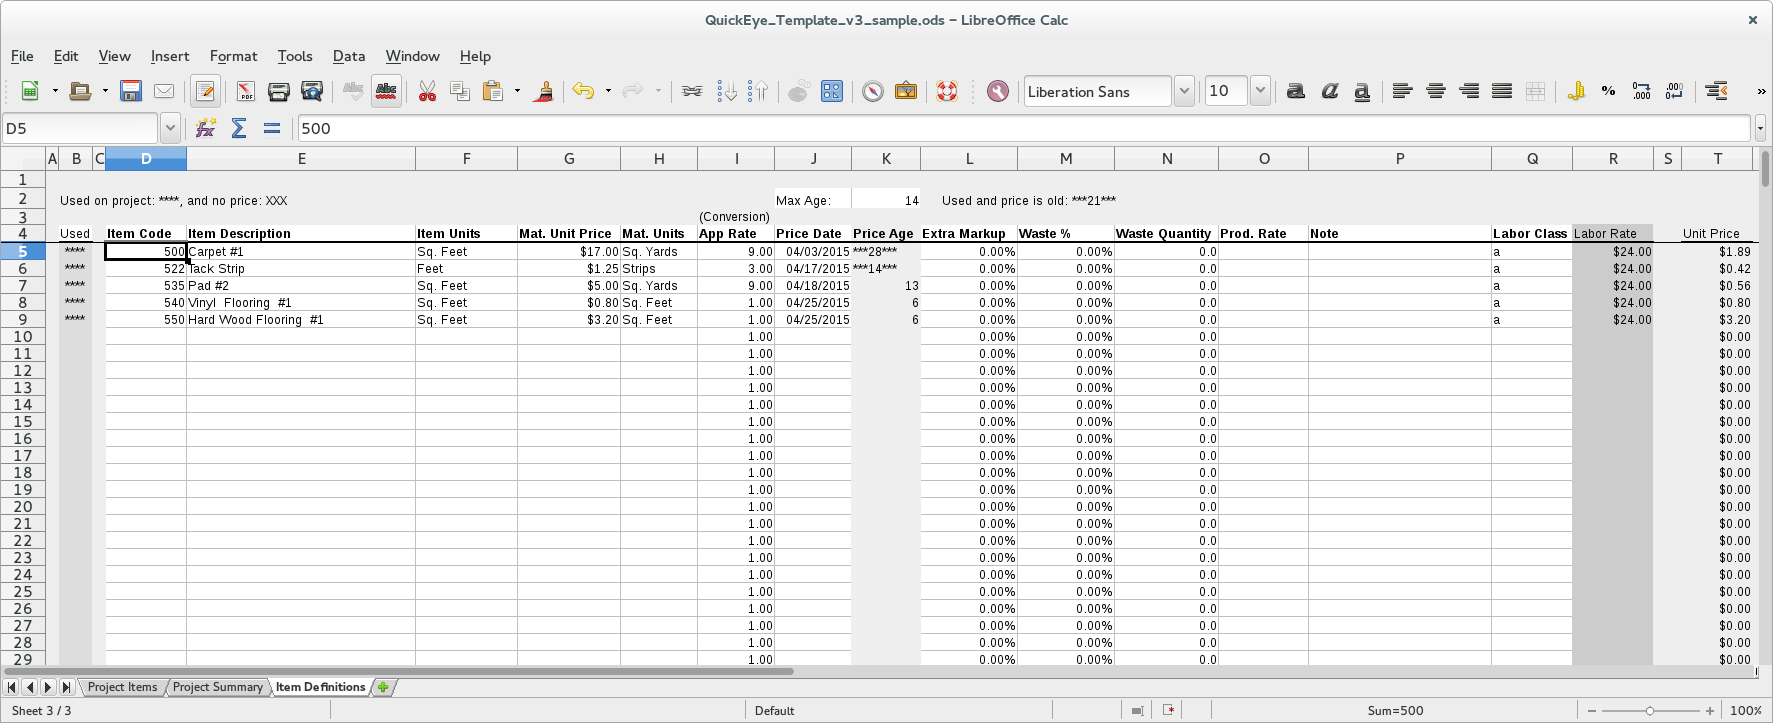
Template Setup
To prepare the template for use, by customizing it to match your companies
items and practices, first set up Item Definitions on the third sheet.
In general, the use of item codes in
QuickEye Estimator is optional. But
to use this spreadsheet as it's designed, each item created in
QuickEye
needs to have a code and a matching item code in the spreadsheet's Item
Definitions list.
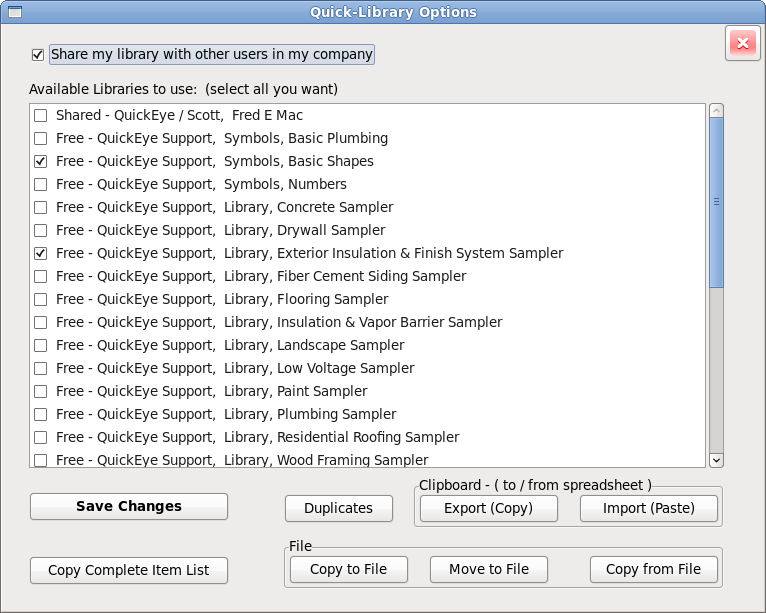
Using the Quick-Library of
QuickEye, it's easy to set up all your items
with pricing codes. They only need to be entered once, and then selected
as they are needed. Each Quick-Library entry also includes a description,
modifiers to convert to the needed units or apply wall heights or slab
thicknesses, and the output units label.
Each of the codes, to work efficiently with the spreadsheet, needs to
uniquely identify the supplied material and labor operation of the item
in order to satisfy the estimating process.
So the key thing to remember about the codes as you create them, is that
if the same material can be installed two different ways with quite different
production rates, then you need two Quick-Library entries with two different
codes. That way, when the item is matched up by code with an item in the
spreadsheet, you can have different default production rates, even if it's
the exact same material.
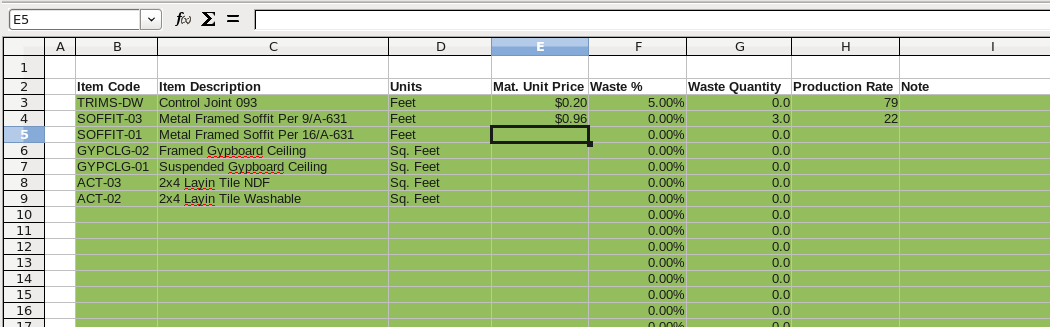
Once you have the list of items, you then add the other information
about them. Material Unit Price is the cost per unit for the material
supplied.
This is a area where a specialty database for costing, designed for your
trade, can be a huge benefit. With this simple spreadsheet, you need
to take the current cost, for example, of a gallon of paint and devide
that by the coverage rate of that product (spread rate) to determine the
cost per square foot. A spreadsheet such as this could be expanded (more
columns and formulas) to handle this case, but there may be other trades
where after a certain point it's more cost effective to purchase dedicated
software.
The next two columns, Waste % and Waste Quantity, are pre-filled in
with zeros for convenience, and allow you to pad the material cost
to cover the cost of estimated waste. The percentage column increases
the unit quantity by a percentage of the whole, while the quantity
column increases it by a fixed quantity. They can be used in
combination to account for waste on large projects (without over-adding)
and small projects (without under-adding).
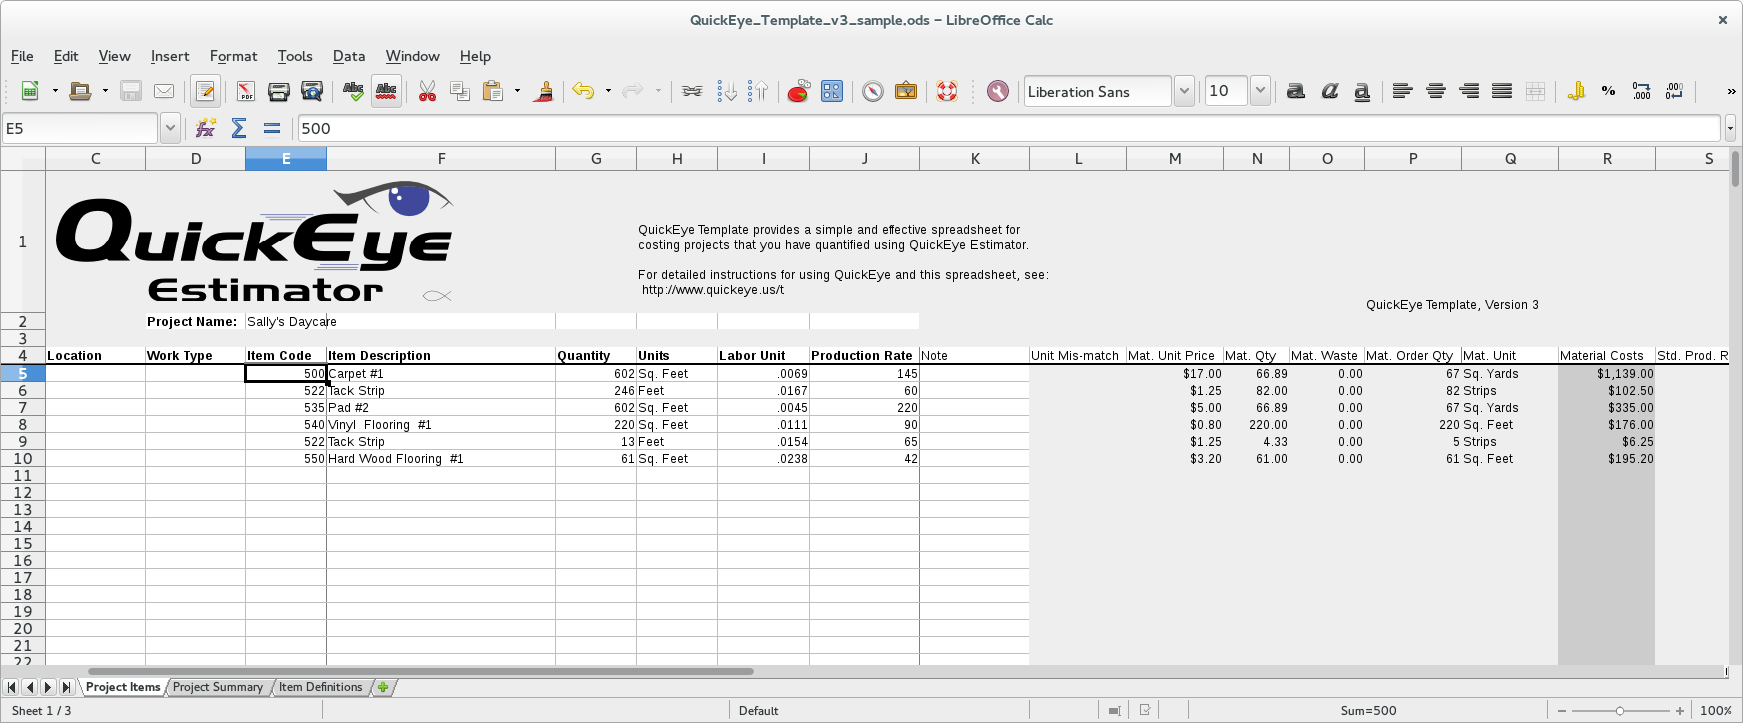
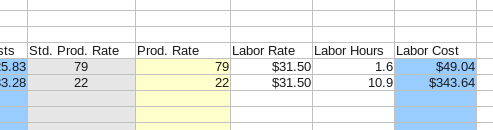
The Production Rate is how many 'Units' per hour will be installed
or applied, to calculate the labor hours. This will be displayed on
the Project Items sheet as 'Standard Production Rate', but not directly
used in the calculation. The column next to it (on the Project Items
sheet), 'Production Rate' will reflect the standard rate but allow you
to override it to fine tune the estimate for the conditions on this
project. So the standard rate in the template is a suggestion for the
estimator to consider.
The way the spreadsheet is set up, a production rate on
Item Definitions may be left blank or entered as a range, e.g.
'105 - 120', and on the Project Items list, an error will be displayed
until a numeric production rate is entered. This way, the template
can be set up so that for certain, important items, the estimator
will have to manually enter a production rate to complete the
estimate. This is a feature which can be employed on all the items or
none of them or anywhere in-between. This way, key items, which are
critical to winning bids and maintaining profit, can be set up to
force the estimator to consider the value on every project, instead
of using a default value without due consideration.
The next column, Note, will be reflected on the Project Items sheet
and may be used for any purpose, such as reminders to consider a certain
aspect of that item or to call for a material quote. This column
on the Project Items sheet can also be overridden to reflect estimator
notes specific to the project.
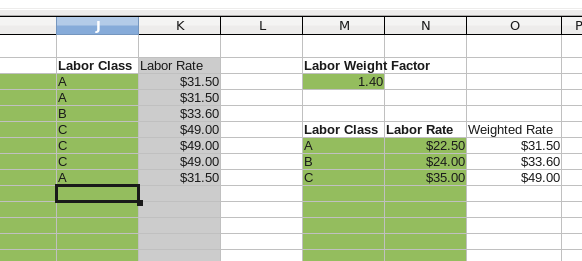
The other columns on the Item Definitions sheet are for the Labor Rate
calculation and assignment. The Labor Class can be any designation you
choose (letter, number or word). The chart on the right needs each labor
class once, and the labor class column in the Item Definitions will
display the calculated rate based on a lookup from the chart on the right.
The Labor Rate Factor can be set to markup labor to cover overhead or be
left at 1.0 if your company marks up everything uniformly. (See our
Contractor Resources for information on this topic.) If you want this
left at 1.0, cells on the Project Summary sheet will allow you to perform
uniform markups. A factor of 1 will leave Labor Rate and Weighted Rate
the same.
The labor rates entered here may be a single number or very detailed
and item specific. If your estimating requires calculations for multiple
workers and varied rates, or you have many factors you would like to use
to calculate the current rate, this may be another area where you can
expand the spreadsheet or purchase a specialized pricing database product.
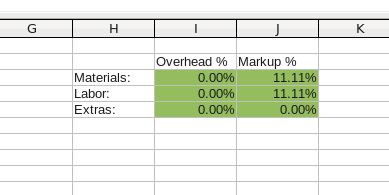
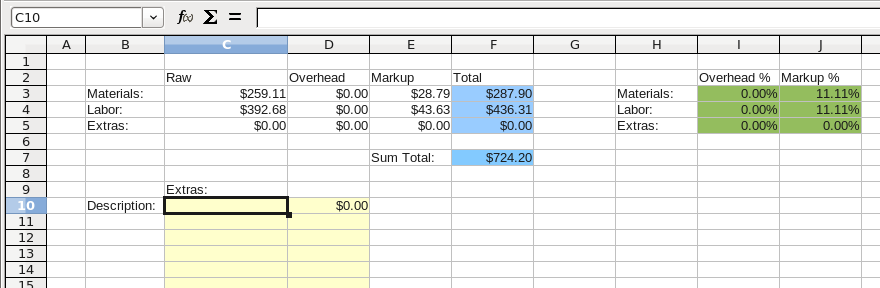
The final cells which need set up in the template are the markups
on the Project Summary sheet. If you markup everything evenly,
just fill in accordingly. The settings shown, assume that overhead
is recovered in the weighted labor rate and are set for 10% profit
on labor and materials.
You may also want to enter some standard Extra items which occur on
all of your bids, depending on your trade.
Now that everything needed in the template is all set, save as a template
and put it in the location of your choice. You can use save as and select
the current spreadsheet template and override it, or just save normally
and then rename the file extension to make it a template.
Template Usage
Now create a new spreadsheet from the template for each new project.
Enter the Project Name on the top of the Project Items sheet and save
the spreadsheet under the name of the project.
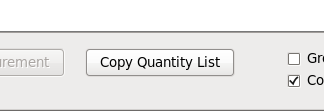
Once all the Quantity Items are created in
QuickEye, use the 'Copy
Quantity List' button on the Item Summary dialog to put the list on
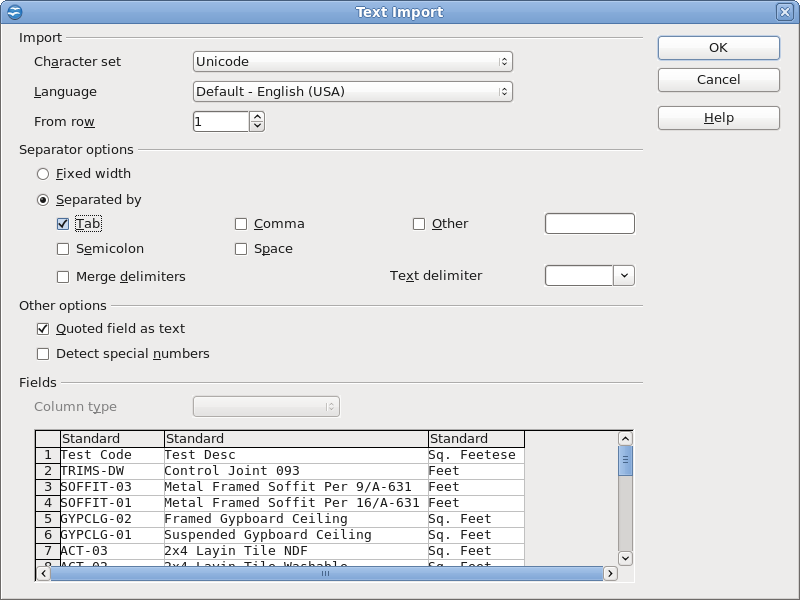
the clipboard. Then paste the list into the first Item Code cell on the
Project Items sheet. If you are including some of the optional fields in
the list, then paste more to the left so that the Item Code falls into the
correct location.
Again, you will see the Text Import dialog and in LibreOffice you must
select the Tab checkbox.
After pasting in the list, look for any errors in the Material Costs or
Labor Costs columns. Any Item Codes which are in the Item List for the
current project but do not have a matching Item Definition will need to
be resolved.
 QuickEye
 allows you to store production rates in the Quick-Library,
which will copy to the Quantity Item list and then into the spreadsheet. This
feature is totally optional but allows you to adjust the production rate in
QuickEye while you are working with the drawings. This also provides
for having the same item in two places on the drawings with different production
rates to adjust for different conditions for the most accurate bids.
In the spreadsheet, if the production rate column in the list from
QuickEye
is filled in, that rate will carry to the right as the production rate for the
labor calculation. Otherwise the Standard Production Rate (which is looked up
from the Item Definitions sheet) will be used. The Production Rate column
contains a simple formula which is un-protected (may be changed or replaced)
so you can override it here for project conditions. The formula is set up to
only copy numeric values so if the Standard rate is a range, then you will
need to define a number to resolve the error shown. Review each one, whether
or not there is an error displayed and adjust as necessary.
Once all the missing info is resolved you are ready to move on to the Project
Summary.